Blood Sample Instructions
We understand collecting your own samples can be daunting, and so we've provided the instructions below. Each Yoxly kit also includes detailed instructions taking you step-by-step through the process. Our users tell us that by following these instructions, collecting your samples is relatively easy and straightforward.

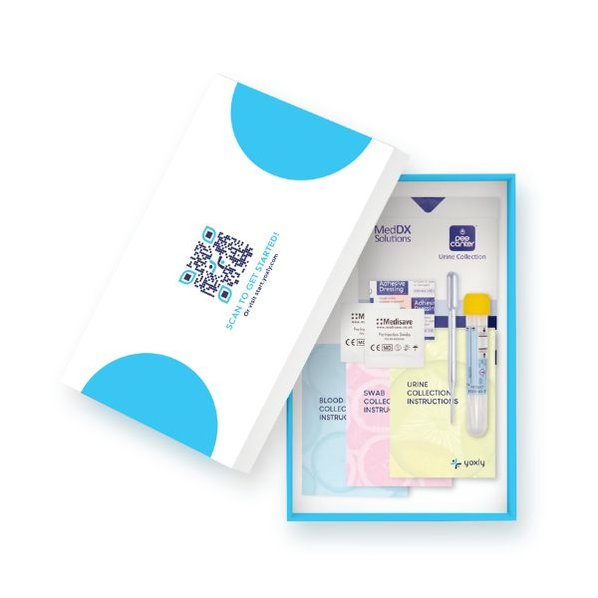
How to Collect Your Blood Sample
Collecting Your Samples - We understand collecting your own samples can be daunting, and so we've provided the instructions below. Each Yoxly kit also includes detailed instructions taking you step-by-step through the process. Our users tell us that by following these instructions, collecting your samples is relatively easy and straightforward.
When Should you Collect Your Samples? - It is important your sample reaches our lab the day after you take it. Therefore, you must take your sample on the same day it can be posted (e.g. not after the post has been collected, or on a bank holiday or a weekend).
Do You Have More Questions? - If you have questions about collecting your sample, your kit, or collecting your sample, please contact us at support@yoxly.com. We're available seven days a week!
Some Tips Before You Start

Ensure your are well hydrated
Just before collecting your sample:
○ Have a meal
○ Drink two glasses of water

Ensure your are warm
One hour before collecting your sample:
○ Run your hands under warm water for 3 minutes
○ Consider taking a hot shower or a bath, so long as you are well hydrated

Get the blood pumping
Try doing 15 jumping jacks or push-ups just before you start
Step-By-Step Instructions

Step 1.
Wash your hands in warm, soapy water for at least 2 minutes and dry them thoroughly.

Step 2.
Remove the blood tube from its clear protective casing by twisting the translucent rim (below the yellow cap).

Step 3.
Remove the blood tube from its clear protective casing by twisting the translucent rim (below the yellow cap).

Tip: Before collecting your sample, let your arms hang down below your waist for 1-2 minutes

Step 4.
Use an alcohol wipe to clean the finger from which you’ll collect your blood sample.
Note: The best place to collect your sample is from the side of the tip of a finger on your non-dominant hand.

Step 5.
Prepare a lancet by twisting and removing the small blue tip.
Caution: Lancets are activated when pressed against the skin, and should only be used once.

Step 6.
Position the lancet on the side of the tip of the selected finger. With the lancet positioned on your finger, activate it by pressing it firmly down on your skin.

Tip: Prick the side of a fingertip (rather than the pad) on your non-dominant hand

Step 7.
After piercing the skin, wipe away the first drop of blood with a clean tissue.

Step 8.
Stand over the open blood tube with your pierced finger pointing into the mouth of the tube.

Step 9.
Gently “milk” your finger by applying pressure in a downward motion from your palm to the tip of your finger.

Step 10.
Continue to milk your finger, guiding the blood droplets into the tube. Continue until the tube is filled to the line marked “0.8ml”. If the bleeding stops before you’ve filled the tube, you’ll need to re-pierce your finger with a new lancet.

Tip: If you don’t get enough from one finger prick, use another lancet and follow the same steps using a different finger

Step 11.
Once the tube is filled to “0.8ml”, replace the cap and press it tightly closed (until you hear it click).
Note: A tube insufficiently filled may not be processed by our laboratory.

Tip: If you’re struggling to take your own blood sample, ask a friend to help and offer support

Step 12.
Place a plaster on your pierced fingertip(s) to stop the bleeding.

Step 13.
Gently invert the blood tube five times.

Step 14.
Replace the blood tube in its clear protective casing and screw it in.

Step 15.
Put the tube (in its protective casing) into the clear biohazard bag, tucking in the white absorbent pad, and seal it securely. Empty your kit box. Place the sealed biohazard bag into the box and close it. Place your kit box into the striped return envelope. Seal it securely.

Step 16.
Post your return envelope in any Royal Mail postbox (ensure it can be collected that same day).

Still struggling? Reach out.
Having trouble obtaining your samples? Don't worry. Reach out to our committed customer support team, and they'll assist you throughout the process.
Our At-Home STI Kits
Our tests are convenient, safe, and secure, allowing you to test from the privacy of your home.
